Keyboard PCBs (Printed Circuit Boards) are crucial components in mechanical keyboards, serving as the foundation for key switches and circuitry. They determine not only the keyboard’s functionality but also its responsiveness, durability, and overall user experience. Let’s delve into the key aspects of keyboard PCB.
What is a Keyboard PCB?
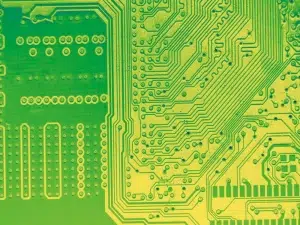
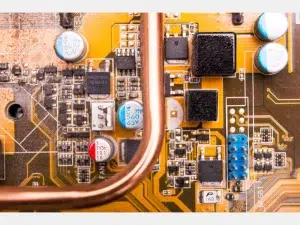
A keyboard PCB is a flat board made of insulating material, typically fiberglass, with conductive pathways etched onto its surface. These pathways connect the key switches to the microcontroller, allowing for the detection of key presses and the communication of that data to a computer.
How many types of Keyboard PCB are there?
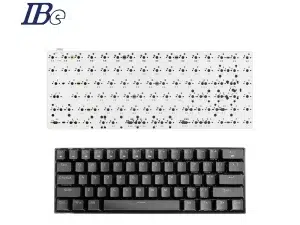
1. Hot-Swap PCBs: These allow users to replace key switches without soldering, making customization easy. Hot-swap PCBs have sockets for each switch, enhancing user flexibility.
2. Soldered PCBs: These require soldering the switches directly onto the board. This type often provides a more stable connection but limits customization options.
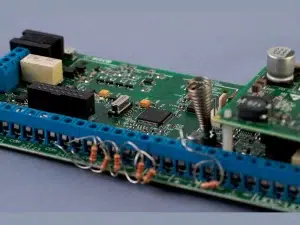
3. Single vs. Multi-Layer PCBs: Single-layer PCBs are simpler and easier to manufacture, while multi-layer designs can support more complex layouts and features.
What are the features of Keyboard PCB?
– Switch Compatibility: Most PCBs are designed to work with specific switch types, such as Cherry MX or Gateron. Compatibility affects the feel and sound of the keyboard.
– Layout Options: Different layouts (e.g., ANSI, ISO, or custom) influence the PCB design. This affects key placement and overall ergonomics.
– RGB Lighting: Many modern PCBs support customizable RGB lighting, enhancing aesthetics and providing visual feedback during use.
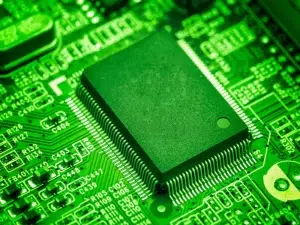
– Microcontroller Integration: A microcontroller on the PCB interprets key presses and communicates with the computer. Popular options include the Atmega32U4 for its USB capabilities.

What does the keyboard PCB schematic include?
Creating a keyboard PCB schematic involves outlining the connections between key switches, the microcontroller, and any additional components like LEDs or diodes. Here’s a simplified overview of what a typical keyboard PCB schematic includes:
Components in a Keyboard PCB Schematic:
1. Microcontroller: Acts as the brain, detecting key presses and sending signals to the computer.
2. Key Switches: Represented by switches (e.g., SPST) in the schematic, each connected to the microcontroller.
3. Diodes: Often placed in series with each switch to prevent ghosting and allow for N-key rollover.
4. Resistors: Used for pull-up or pull-down configurations, ensuring stable readings from the switches.
5. LEDs: For backlighting or indicator lights, connected to appropriate pins on the microcontroller.
Basic Layout:
– Rows and Columns: Switches are typically arranged in a matrix layout, where each row and column is connected to the microcontroller.
– Power Supply: Indicate where power is supplied to the PCB, often via USB.
– Ground Connections: Ensure all components share a common ground.
For an actual schematic, using software like KiCAD or Eagle is recommended to create a detailed and functional design. This will help visualize the connections and layout before fabrication.
What should be considered when PCB Design ?
When designing or choosing a keyboard PCB, several factors should be considered:
– Trace Width and Resistance: Wider traces can reduce resistance and improve signal integrity, especially in high-speed applications.
– Grounding: Effective grounding minimizes interference and enhances performance, particularly for wireless keyboards.
– Component Placement: Efficient layout of switches and components ensures optimal performance and ease of assembly.
How many layers does a PCB keyboard have?
A typical keyboard PCB can have anywhere from one to four layers, depending on the complexity of the design:
1. Single-Layer PCBs: Common in basic keyboards, these have all traces and connections on one layer. They are simpler and more cost-effective but may have limited functionality.
2. Double-Layer PCBs: More common in mechanical keyboards, these have traces on two layers, allowing for more complex routing and additional features like backlighting.
3. Multi-Layer PCBs: Some high-end keyboards may use three or four layers to accommodate intricate designs, additional components, or enhanced performance features.
The choice of layers impacts the keyboard’s performance, durability, and cost.
How thick should keyboard PCB be?
The thickness of a keyboard PCB typically ranges from 1.6 mm to 2.4 mm. The most common thickness is 1.6 mm, which provides a good balance of durability and flexibility. Thicker PCBs (e.g., 2.0 mm to 2.4 mm) may offer added strength and rigidity, especially for high-end or custom keyboards. Ultimately, the choice depends on the desired build quality and design requirements.
What’s the process of keyboard PCB manufacturing and assembly?
Keyboard PCB Manufacturing and Assembly: A Comprehensive Overview
The manufacturing and assembly of keyboard PCBs are crucial steps in producing high-quality mechanical keyboards. This process involves several stages, from design to final assembly. Here’s an overview of each step.
-1). Design Phase
Schematic Design: Use PCB design software (e.g., KiCAD, Altium) to create the schematic, defining the circuit connections for switches, microcontrollers, and other components.
PCB Layout: Convert the schematic into a physical layout, placing components and routing traces. Consider factors like trace width, spacing, and grounding.
-2). PCB Manufacturing
Material Selection: Most keyboard PCBs use FR-4 (fiberglass) material, but other options exist based on specific requirements.
Photolithography: Transfer the PCB design onto a copper-clad laminate using light-sensitive materials, defining the circuit paths.
Etching: Remove unwanted copper using chemical solutions, leaving only the desired circuit traces.
Drilling: Create holes for switches, LEDs, and mounting points. Automated machines typically perform this step.
Surface Finish: Apply a finish (e.g., HASL, ENIG) to improve solderability and protect the copper traces.
-3). Component Sourcing
Procurement: Source components like switches, microcontrollers, resistors, and LEDs from suppliers. Ensure quality and compatibility with the PCB design.
-4). Assembly Process
Soldering Methods: Choose between hand soldering, wave soldering, or surface mount technology (SMT) for component attachment. SMT is commonly used for its efficiency and precision.
Placement: Place components on the PCB, ensuring correct orientation, especially for polarized components like diodes and electrolytic capacitors.
Soldering: Secure components to the board using the chosen soldering method, ensuring strong electrical connections.
-5). Testing and Quality Control
Functionality Testing: After assembly, conduct tests to ensure all keys work correctly, and the microcontroller responds accurately.
Visual Inspection: Check for solder defects, component misplacement, and overall board quality.
-6). Final Assembly
Enclosure Integration: Once the PCB passes testing, integrate it into the keyboard case along with keycaps, stabilizers, and other components.
Final Testing: Perform a final check to ensure the complete keyboard functions as intended.

List of Keyboard PCB manufacturers
elepcb
https://www.elepcb.com
PCBMay
https://www.pcbmay.com
RAYPCB
https://www.raypcb.com
venture-mfg.com
https://www.venture-mfg.com
PCBBUY.COM
https://www.pcbbuy.com
PCBTok
https://www.pcbtok.com
topfastpcb.com
https://www.topfastpcb.com
Highleap Electronic
https://hilelectronic.com
ymspcb
https://www.ymspcb.com
IBE
https://www.pcbaaa.com
Conclusion
Keyboard PCBs are vital to the functionality and user experience of mechanical keyboards. By understanding their types, features, and design considerations, users and builders can make informed choices that enhance performance and customization. Whether you’re a hobbyist or a professional, delving into keyboard PCB design opens up a world of possibilities for creating the perfect typing experience.
A keyboard PCB is a flat board made of insulating material, typically fiberglass, with conductive pathways etched onto its surface.
Components in a Keyboard PCB Schematic:
1. Microcontroller
2. Key Switches
3. Diodes
4. Resistors
5. LEDs
The thickness of a keyboard PCB typically ranges from 1.6 mm to 2.4 mm. The most common thickness is 1.6 mm, which provides a good balance of durability and flexibility.