In the world of electronics, the creation of printed circuit boards (PCBs) is a crucial step in bringing electronic designs to life. One of the essential processes in PCB fabrication is etching, which plays a pivotal role in defining the electrical pathways on a circuit board. This article delves into the nuances of PCB etching, exploring its purpose, methods, and the machinery involved.
What is PCB Etching?
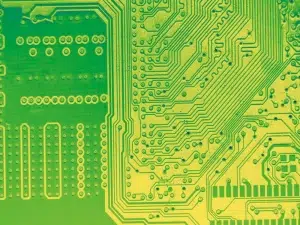
PCB etching is a process used to remove unwanted copper from a copper-clad board to create the desired circuit pattern. This technique involves selectively eroding the copper layer to form the conductive paths that will connect various electronic components on the board. The process is essential for producing the intricate circuitry found in modern electronic devices.
What is the Purpose of PCB Etching?
The primary purpose of PCB etching is to define the electrical pathways that will carry current between different components on a circuit board. By removing excess copper, etching ensures that only the intended circuit traces remain. This step is crucial for creating functional and reliable electronic devices, as it allows for precise control of electrical signals and minimizes interference between different circuit paths.
What is the Best Etching Method for PCB?
Several etching methods are used in PCB fabrication, each with its advantages. The most commonly employed methods include:
-1. Chemical Etching: This is the most widely used method, involving the use of chemical solutions to dissolve unwanted copper. It can be further classified into:
– Alkaline Etching: Using solutions like ammonium persulfate.
-2. Laser Etching: Employs laser beams to ablate the copper layer. This method is highly precise and suitable for detailed work.
-3. Mechanical Etching: Involves physically scraping or brushing away the copper. While less common, it can be used for specific applications.
The choice of method depends on factors such as the complexity of the PCB design, the volume of production, and the desired precision.
What is Etching vs Engraving PCB?
Etching and engraving are both methods used to define patterns on a PCB, but they differ significantly:
– Etching: Involves removing unwanted copper from the surface of the PCB using chemical or physical processes. The result is a circuit pattern that remains on the board after the unwanted copper is dissolved or removed.
– Engraving: Involves physically carving into the PCB material to create patterns or designs. This is usually done using CNC machines or laser engravers. Engraving typically results in deeper cuts into the material and is used for different applications than etching.

What is the Process of PCB Etching?
The PCB etching process generally involves the following steps:
1. Design Layout: Create the circuit design using PCB design software.
2. Printing the Design: Transfer the design onto a copper-clad board using a phototransfer process or a similar method.
3. Etching: Submerge the board in an etching solution to remove unwanted copper, leaving behind the circuit pattern.
4. Cleaning: Rinse the board to remove any residual etching solution.
5. Inspection: Verify the etched pattern to ensure it meets design specifications.
6. Further Processing: Perform additional steps such as drilling and solder masking as needed.
What Machine is Used for PCB Etching?
Several machines are used in PCB etching, each suited to different needs:
– Manual Etching Tanks: For small-scale or hobbyist use, these are simple tanks where the board is manually immersed in the etching solution.
– Automated Etching Machines: These machines automate the etching process and are used in commercial PCB manufacturing. They offer precise control over the etching parameters.
– Laser Etching Systems: Use lasers to precisely etch the copper layer. They are ideal for high-resolution and complex designs.
What Temperature Do You Etch PCB?
The temperature for PCB etching depends on the etching solution being used. Typically, the etching solution is heated to improve the etching rate and uniformity. For common etchants like ferric chloride, the temperature is usually maintained between 40°C to 50°C (104°F to 122°F). However, it is essential to follow the specific guidelines for the etching solution being used.
How Do You Clean PCB Before Etching?
Cleaning the PCB before etching is crucial to ensure good adhesion of the resist material and to prevent defects. The cleaning process generally involves:
1. Degreasing: Use a solvent or detergent to remove any grease, oil, or other contaminants from the board’s surface.
2. Rinsing: Wash the board with water to remove any residual cleaning agents.
3. Drying: Ensure the board is thoroughly dried before proceeding with the etching process. Any moisture left on the board can affect the etching results.

What tool is used for PCB etching?
PCB etching is a crucial process in electronics manufacturing, used to create the circuit patterns on a PCB. Several tools and methods are commonly used for PCB etching:
-1. Chemical Etching Solutions: This method involves using chemical solutions to remove the unwanted copper from the PCB. Common etchants include:
– Cupric Chloride (CuCl₂): Known for its higher etching speed and reusability.
– Ammonium Persulfate (APS): Another option that provides good results and is less messy.
-2. Laser Etching: A more advanced method where a laser is used to ablate or remove copper from the PCB. This method is precise and can be used for both prototyping and production.
-3. Dry Film Photoresist: This process uses a photosensitive film applied to the PCB. After exposing the film to UV light through a mask, the unexposed areas are etched away. It’s widely used in PCB manufacturing for its precision and ability to produce fine traces.
-4. Manual Etching Kits: For small-scale or hobbyist use, manual etching kits are available. These typically include a small container for the etching solution, a brush for applying the solution, and other necessary tools for the process.
-5. Etching Machines: Automated etching machines are used in professional settings for higher-volume production. These machines control the etching process more precisely, often incorporating features like agitation and temperature control to improve the quality and consistency of the etching.
-6. Mechanical Etching: This method involves physically scraping away the copper layer using abrasive tools or methods. It’s less common but can be used for specific applications where chemical etching is not feasible.
Each method has its own advantages and is chosen based on the specific needs of the project, such as the complexity of the PCB design, the scale of production, and the level of precision required.
Conclusion
PCB etching is a fundamental process in electronics manufacturing that allows for the precise creation of circuit paths. By understanding the different etching methods, processes, and equipment involved, manufacturers and hobbyists alike can produce high-quality PCBs tailored to their specific needs. Whether you are working on a small-scale project or a high-volume production run, mastering the art of PCB etching is key to achieving reliable and efficient electronic designs.
PCB etching is a process used to remove unwanted copper from a copper-clad board to create the desired circuit pattern.
Chemical Etching
Laser Etching
Mechanical Etching
1. Design Layout: Create the circuit design using PCB design software.
2. Printing the Design: Transfer the design onto a copper-clad board using a phototransfer process or a similar method.
3. Etching: Submerge the board in an etching solution to remove unwanted copper, leaving behind the circuit pattern.
4. Cleaning: Rinse the board to remove any residual etching solution.
5. Inspection: Verify the etched pattern to ensure it meets design specifications.
6. Further Processing: Perform additional steps such as drilling and solder masking as needed.