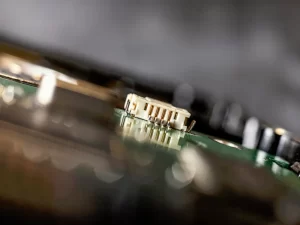
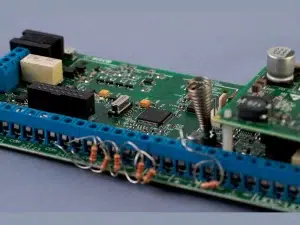
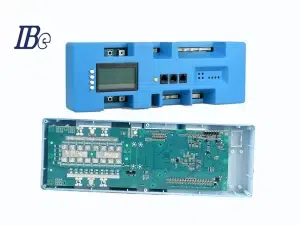
PCB jumper wires, often referred to simply as jumpers, are small conductive wires used to establish electrical connections between different points on a printed circuit board. These wires are typically insulated with a thin layer of plastic or polymer, leaving only the metal conductor exposed at the ends. They come in various lengths, gauges, and colors to suit different circuit layouts and design requirements.
Jumper wires are typically small gauge wires that are soldered onto the PCB surface. They come in various colors to help distinguish between different connections, and they can be insulated or bare depending on the specific application and environmental factors.
While PCB jumper wires are a useful tool for making temporary or small-scale modifications to a PCB, they are not typically used in production-grade PCBs due to their manual nature and the potential for reliability issues over time. Instead, designers strive to create PCB layouts that minimize the need for jumper wires and ensure robust and reliable electrical connections.


Soldering jumper wires to a circuit board is a common practice in electronics assembly and repair. Here’s a step-by-step guide on how to solder jumper wires effectively:
### Materials Needed:
1. Jumper wires
2. Circuit board
3. Soldering iron
4. Solder
5. Flux (optional, but recommended)
6. Soldering flux pen or flux applicator (if not using flux core solder)
### Steps:
1. **Prepare the Circuit Board:**
– Ensure the circuit board is clean and free from any debris, oxidation, or contamination. You can clean the board using isopropyl alcohol and a lint-free cloth.
2. **Prepare the PCB Jumper Wires:**
– Cut the jumper wires to the desired length, ensuring they are long enough to make the necessary connections but not too long to cause interference or strain on the board.
– Strip a small amount of insulation (usually about 1/8 inch or 3 mm) from each end of the jumper wires using wire strippers.
3. **Tinning the Wires:**
– Apply a small amount of solder to the exposed copper wire ends. This process, known as “tinning,” helps to prevent oxidation and makes it easier to solder the wires to the circuit board later.
4. **Prepare the Soldering Iron:**
– Turn on your soldering iron and allow it to heat up to the appropriate temperature for soldering electronic components (typically between 300°C to 400°C or 572°F to 752°F).
– Clean the soldering iron tip using a damp sponge or brass wire tip cleaner to ensure it is free from oxidation and debris.
5. **Apply Flux (Optional):**
– Apply a small amount of flux to the solder pads on the circuit board where you will be soldering the jumper wires. Flux helps to improve solder flow and wetting, resulting in stronger and more reliable solder joints.
6. **Solder the PCB Jumper Wires:**
– Place the tinned end of the jumper wire onto the solder pad on the circuit board, ensuring it aligns correctly with the intended connection point.
– Hold the soldering iron tip against the exposed wire end and the solder pad on the circuit board simultaneously.
– Allow the solder to melt and flow onto the joint, creating a secure bond between the wire and the pad.
– Remove the soldering iron and hold the wire in place until the solder cools and solidifies, forming a strong connection.
– Repeat this process for each jumper wire connection, ensuring proper alignment and spacing between wires to avoid short circuits.
7. **Inspect and Test:**
– Once all jumper wires are soldered in place, visually inspect each solder joint to ensure they are shiny, smooth, and free from cold solder joints or other defects.
– Test the continuity and functionality of the connections using a multimeter or other appropriate testing equipment to verify that the circuit operates as intended.
8. **Trim Excess Wire (Optional):**
– If desired, trim any excess length of jumper wire using wire cutters or flush cutters to improve the appearance and minimize the risk of interference with nearby components or circuitry.