In the intricate world of electronics, the Printed Circuit Board (PCB) serves as the backbone that connects and supports various components of a device. Among the various types of PCBs available, the 2 layers PCB stands out as a fundamental type of circuit board with two layers of copper traces separated by a substrate, widely used in electronics for its balance of cost, simplicity, and effectiveness in handling moderate complexity designs.
What is a 2 layer PCB ?

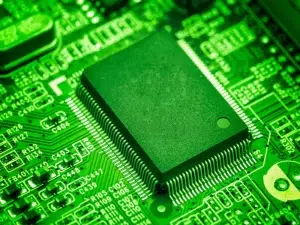
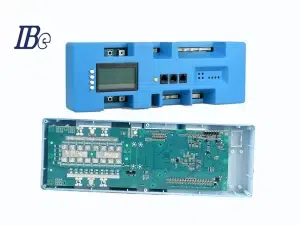
A 2 layers PCB, as the name suggests, consists of two layers of conductive material separated by a non-conductive substrate material, typically fiberglass reinforced with epoxy (FR4). The conductive layers are usually made of copper and are etched to create pathways, also known as traces, that connect different components on the board.
What are the advantages of 2 layers PCB ?
Cost-Effective: 2 layers PCBs are generally more affordable compared to PCBs with higher layer counts. This makes them suitable for applications where cost is a significant factor.
Easier to Design: Designing a 2 layers PCB is typically simpler and requires less complexity in routing compared to multi-layer PCBs. This can reduce design time and potentially lower development costs.
Easier to Manufacture: Manufacturing processes for 2 layers PCBs are well-established and widely available, leading to quicker turnaround times and easier sourcing of manufacturing services.
Suitable for Many Applications: They are suitable for a wide range of applications where moderate circuit complexity and space constraints are present but do not require the complexity and cost of higher layer count PCBs.
Improved Signal Integrity: In some cases, a 2 layers PCB can offer better signal integrity compared to a single-layer PCB due to the ability to route signal traces on both sides of the board and use ground and power planes effectively.
What are the characteristics of a 2 layers PCB ?
Layers: As the name suggests, a 2 layers PCB has two layers of conductive copper traces. These traces are used to create electrical connections between components mounted on the board.
Substrate: Between the two copper layers, there is a non-conductive substrate material (often fiberglass or epoxy resin) that provides mechanical support and insulation between the conductive layers.
Components: Electronic components such as resistors, capacitors, integrated circuits, and connectors are mounted on both sides of the PCB and interconnected by the copper traces.
What’s the application of 2 layers PCB ?
The versatility and cost-effectiveness of 2 layers PCB make them suitable for a wide range of applications, including but not limited to:
• Industrial equipment and controls
• Automotive electronics
• Medical devices
• IoT (Internet of Things) devices
• Prototyping and development boards
What is the difference between single and double layer PCB?

Structure
* A single-layer PCB consists of a single layer of conductive material (usually copper) sandwiched between layers of non-conductive substrate material (typically fiberglass or epoxy resin).
* A double-layer PCB has two layers of conductive copper separated by a substrate material. The substrate provides insulation and mechanical support.
Routing
* All components and their connections are located on one side of the board. This means that all traces (conductive pathways) must be routed on this single layer.
* Components and their connections can be placed on both sides of the PCB, allowing for more extensive routing of traces. Vias (plated-through holes) are used to connect traces between the top and bottom layers.
Applications
* Single-layer PCBs are used in simpler electronic devices and applications where circuit complexity is low, such as in calculators, LED lighting, basic electronic toys, and some consumer electronics.
* Double-layer PCBs are widely used in a variety of electronic devices and applications, including consumer electronics, industrial equipment, medical devices, automotive electronics, and more.
How to design 2 layers PCB ?
Designing a 2 layers PCB board involves several steps and considerations to ensure the circuit functions correctly and reliably. Here’s a general overview of the process:
1. Define Requirements and Specifications:
– Understand the functionality and performance requirements of the circuit.
– Determine the physical dimensions of the PCB and any constraints (e.g., space limitations in the final product).
2. Schematic Design:
– Place components and connect them logically according to the circuit diagram.- Assign designators (like R1, C2, U3) to components and ensure all connections are correctly made.
3. PCB Layout Design:
– Place components on the PCB layout considering factors such as signal integrity, thermal management, and mechanical constraints.
– Orient components for optimal routing and ensure they fit within the designated PCB dimensions.
4. Routing:
– Follow best practices for routing, such as minimizing trace lengths, avoiding sharp angles, and maintaining consistent trace widths.
– Route critical signals first (high-speed signals, sensitive analog signals) and then proceed with power and ground connections.
5. Ground and Power Planes:
– Ground planes should be continuous and cover as much of the PCB as possible to provide a low-impedance return path for signals and reduce EMI.
6. Via Placement:
– Place vias strategically to minimize signal interference and optimize routing efficiency.
7. Design Rule Check (DRC):
– Check for errors such as unconnected traces, overlapping components, or violations of minimum trace widths and clearances.
8. Silkscreen and Documentation:
– Generate fabrication files, including Gerber files, which contain information about PCB layers, copper traces, drill holes, and more.
9. Review and Validation:
– Validate the design by simulating circuit performance if necessary, especially for complex or high-frequency circuits.
How to make a 2 layer PCB ?
Substrate Preparation:
• Cut the laminate sheets to the required size for the PCB panels.
Copper Cladding:
• Apply a layer of copper foil to both sides of the laminate using a lamination process or adhesive.
PCB Drilling:
• Drill holes according to the drill file generated from the PCB layout.
Electroless Copper Deposition:
• This ensures that the drilled holes (vias) are properly metallized to provide electrical connections between the layers.
Imaging and Etching:
• Expose the panels to UV light through a photomask that contains the PCB traces and features.
• Develop and etch the exposed copper areas using chemical etchants, leaving behind the desired copper traces and pads.
Lamination of Layers:
• This process creates a solid, unified structure for the PCB with copper traces on both sides.
Solder Mask Application:
• The solder mask protects the copper traces from oxidation and facilitates soldering during assembly.
Silkscreen Printing:
• This layer helps during component placement and assembly.
PCB Surface Finish:
• Common surface finishes include HASL (Hot Air Solder Leveling), ENIG (Electroless Nickel Immersion Gold), OSP (Organic Solderability Preservatives), and immersion tin or silver.
How to assemble a 2 layers PCB ?

Assembling a 2-layer PCB involves several steps to solder components onto the board and ensure proper functionality. Here’s a detailed process for assembling a 2-layer PCB:
1. Preparation
1. Gather Components:
2. Prepare Tools and Equipment:
3. Review Documentation:
2. Surface Mount Technology (SMT) Assembly
1. PCB Stencil Printing (if using reflow soldering):
– Use a squeegee to evenly spread solder paste through the stencil onto the PCB.
2. Component Placement:
– Ensure correct orientation and alignment of components according to the placement diagram.
3. Reflow Soldering:
– If using a reflow oven:
– The oven heats up according to a programmed temperature profile, melting the solder paste and creating a strong bond between the components and PCB pads.
– Alternatively, if hand soldering:
4. Inspection:
3. Through-Hole Component Assembly
1. Component Insertion:
– Ensure components are flush against the PCB surface and fit securely into their designated positions.
2. Soldering:
– Solder through-hole components using a soldering iron:
– Apply solder to the joint, ensuring a sufficient amount to form a reliable connection.
– Trim excess lead length if necessary.
3. Cleaning:
4. Final Inspection and Testing
1. Visual Inspection:
2. Electrical Testing:
– Use a multimeter or test fixture to check for proper voltage levels, signal integrity, and correct operation of components.
What is the standard thickness of a 2 layers PCB?
The standard thickness of a 2-layer PCB typically ranges from 0.8 mm to 1.6 mm (or 800 microns to 1600 microns). However, the specific thickness can vary depending on the application and design requirements. Here are some common thicknesses for 2 layers PCB:
Standard Thicknesses:
• 1.6 mm (1600 microns): This is one of the most common thicknesses used for 2 layers PCB. It provides good rigidity and durability, suitable for a wide range of applications including consumer electronics, industrial equipment, and automotive electronics.
• 1.2 mm (1200 microns): Another common thickness that balances between space constraints and mechanical stability. It is often used in smaller electronic devices and applications where weight and size are considerations.
• 1.0 mm (1000 microns): Thinner than 1.2 mm, suitable for applications requiring compact PCB designs or where weight reduction is critical, such as mobile devices and wearable electronics.
• 0.8 mm (800 microns): Used in applications where ultra-thin PCBs are necessary, such as in some mobile devices and small electronic gadgets. It provides flexibility in design while maintaining sufficient mechanical strength.
Conclusion
In conclusion, while multi-layer PCBs have their advantages in complex designs requiring dense routing and signal integrity, 2-layer PCBs remain indispensable in many electronic applications. Their simplicity, cost-effectiveness, and adequate performance make them a preferred choice for numerous electronic designers and manufacturers worldwide. As technology continues to evolve, the role of 2 layers PCBs in shaping the future of electronics remains pivotal, providing a solid foundation for innovation and advancement in various industries.
A 2 layers PCB, as the name suggests, consists of two layers of conductive material separated by a non-conductive substrate material, typically fiberglass reinforced with epoxy (FR4).
Define Requirements and Specifications
Schematic Design
PCB Layout Design
Routing
Ground and Power Planes
Via Placement
Design Rule Check (DRC)
Silkscreen and Documentation
Review and Validation
Substrate Preparation
Copper Cladding
Drilling
Electroless Copper Deposition
Imaging and Etching
Lamination of Layers
Solder Mask Application
Silkscreen Printing
Surface Finish