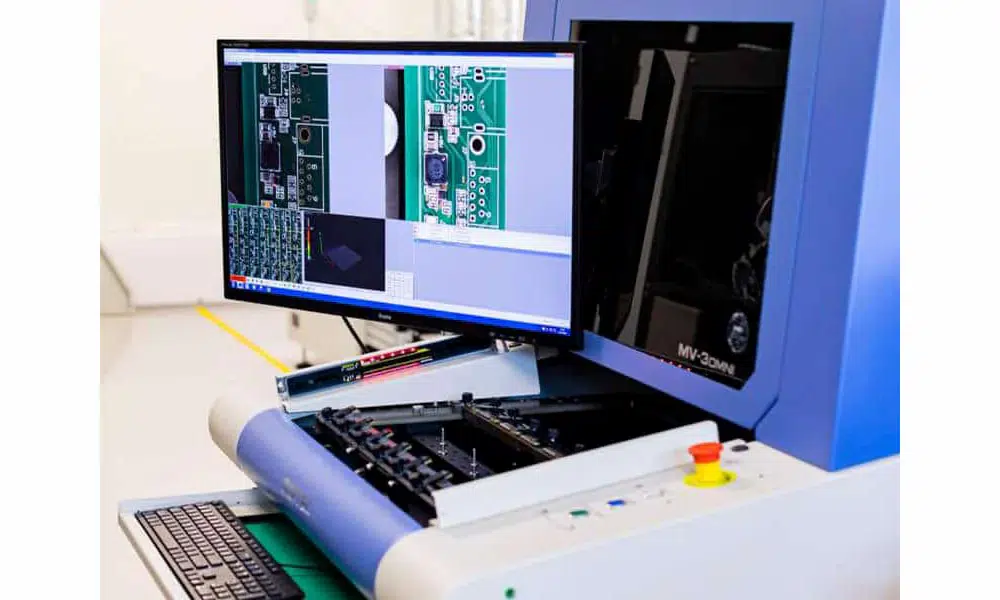
In the world of modern manufacturing, precision and efficiency are paramount. Automated Optical Inspection (AOI) has emerged as a pivotal technology in ensuring the quality and reliability of products across various industries. From electronics to automotive components, AOI inspection plays a crucial role in maintaining high standards and minimizing defects.
What is the meaning of AOI inspection?
AOI stands for Automated Optical Inspection. AOI inspection refers to the automated process of inspecting and evaluating the quality of manufactured components or products using optical imaging and computer vision technologies. It is primarily used in industries such as electronics manufacturing (e.g., PCB assembly), automotive, aerospace, and medical devices to detect defects, inconsistencies, or deviations from specified standards.
What is the function of AOI inspection?
AOI inspection is primarily used to detect defects and abnormalities in manufactured products. It can identify issues such as missing components, misplaced components, soldering defects, scratches, cracks, and other visual imperfections that may impact product performance or reliability.
By inspecting products with high precision and consistency, AOI inspection ensures that every unit meets the specified quality standards. This helps in maintaining product reliability, reducing the likelihood of defects reaching customers, and enhancing overall product quality.
AOI inspection provides valuable data and insights into the manufacturing process. Manufacturers can analyze defect trends, identify root causes of issues, and make necessary adjustments to improve production efficiency and product quality.
When needs AOI inspection in PCBA manufacturing?
AOI inspection is essential in Printed Circuit Board Assembly (PCBA) manufacturing at several key stages to ensure quality and reliability of the final product. Here are the primary instances where AOI inspection is typically employed:
After Solder Paste Printing: AOI systems are used immediately after the solder paste printing process. This stage is critical as it ensures that the solder paste is applied accurately and in the correct amount on the PCB pads before components are placed.
After Component Placement: Once components are placed on the PCB, AOI inspects the board to verify the correct orientation, alignment, and placement of each component. It checks for any missing components, offset placements, or tombstoning (where a component stands upright due to soldering issues).
Post-Reflow Inspection: After the reflow soldering process, AOI inspection checks the quality of solder joints. It verifies that each joint is properly formed, without solder bridges (shorts) or open connections (insufficient solder).
Final Inspection: Before the PCBs are shipped or undergo further assembly processes, a final AOI inspection ensures that all components are correctly soldered, all defects have been addressed, and the PCB meets the required quality standards.
What are the criteria for AOI inspection?
The criteria for AOI inspection typically include various parameters and aspects that need to be evaluated to ensure the quality and reliability of PCB assemblies. Here are the key criteria commonly considered in AOI inspection:
1. Component Presence and Orientation:
2. Component Placement:
3. Solder Joint Quality:
– Inspect solder joints for proper formation, including:
– Presence of solder joints (no missing joints).
– Solder fillet quality (smooth, even, without excess or insufficient solder).
– No solder bridges (shorts) between adjacent pads.
– No cold solder joints (poorly wetted joints).
4. Solder Paste Inspection:
– Ensure correct volume and alignment of solder paste on pads.
5. Component Lead Inspection:
6. Alignment and Positioning:
7. Part Verification:
8. Detecting Defects:
– Identify various defects such as:
– Tombstoned components (standing vertically due to soldering issues).
– Lifted leads.
– Foreign objects or debris.
9. Quality Standards Compliance:
10. Inspection Speed and Accuracy:
11. Data Analysis and Reporting:
These criteria collectively ensure that the AOI system effectively detects and identifies potential defects or anomalies in PCB assemblies, helping to maintain high-quality standards in manufacturing processes. Each criterion can be adjusted and fine-tuned based on specific requirements and the complexity of the PCB assembly being inspected.
How AOI inspection works?
Optical Imaging: AOI systems use high-resolution cameras and sometimes specialized lighting to capture detailed images of the product under inspection.
Image Processing: The captured images are processed using sophisticated algorithms to analyze various aspects such as dimensions, shapes, colors, and textures.
Defect Detection: AI algorithms compare the acquired images against pre-defined standards or models of acceptable products. This process allows AOI systems to identify defects such as scratches, missing components, misalignments, soldering issues, and more.
Data Analysis: AOI inspection not only detects defects but also generates comprehensive data reports. This data aids manufacturers in understanding production trends, identifying potential process improvements, and ensuring compliance with quality standards.
Conclusion
AOI inspection is not just a tool but a cornerstone of modern manufacturing quality control. Its ability to swiftly and accurately detect defects while improving efficiency and reducing costs makes it indispensable across diverse industries. As technology continues to advance, AOI inspection will play an increasingly crucial role in ensuring products meet the highest standards of quality and reliability.
AOI stands for Automated Optical Inspection. AOI inspection refers to the automated process of inspecting and evaluating the quality of manufactured components or products using optical imaging and computer vision technologies.
AOI inspection is primarily used to detect defects and abnormalities in manufactured products. It can identify issues such as missing components, misplaced components, soldering defects, scratches, cracks, and other visual imperfections that may impact product performance or reliability.
After Solder Paste Printing
After Component Placement
Post-Reflow Inspection
Final Inspection

